
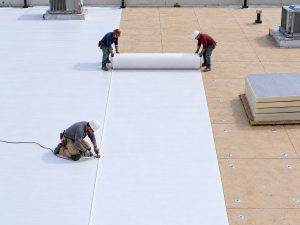
A new roof is a big job for any business. You want to know what the crew will do, how long it takes, and how your building stays protected while the work goes on. This guide walks you through each part of the job so you know what to expect before the first truck shows up.
Want to see how the whole job fits together? Our guide to a step-by-step approach to commercial roof replacement gives you the big picture. Here, we focus on how the work is done in Jeffersonville.
Why Jeffersonville Roofs Need a Careful Plan
Jeffersonville sits right on the Ohio River, across from Louisville. Humid weather, strong spring and summer storms, and winter freeze-thaw cycles put commercial roofs through changing conditions. Water that enters small gaps can damage the layers below the roof surface.
Many buildings here are warehouses, factories, shops, and offices with large flat roofs. These roofs cover a lot of space, so small problems can spread fast if they are missed. That is why a good commercial roof replacement in Jeffersonville, IN starts below the surface. The goal is a roof system whose layers, attachment, flashing, and drainage work together.
Before Work Starts: Permit, Moisture Scan, and Planning
The job starts before roofing materials are removed. Confirm the permit requirements with the Jeffersonville Building Commission and identify who will obtain the permit. Jeffersonville accepts permit applications online, and the city states that contractors working within the city must be licensed with the city and insured. Ask your roofer to show proof of both.
If your building is within the Oak Park Conservancy District, confirm the district’s pre-approval requirements before applying for a city building permit. District approval is a required step for applicable building projects.
Next comes an assessment of the existing roof, including its moisture condition. A moisture survey may help locate suspected wet insulation. Core cuts or other checks may be needed to confirm the findings. The appropriate method depends on the roof assembly and site conditions.
The work plan should cover dates, material staging, crane locations where needed, building access, and protected areas for workers and occupants.
Step 1: Tear Off or Cover Over?
The first big choice is what to do with the old roof. There are two main paths.
Full tear-off: The crew removes the existing roofing down to the deck. This exposes the deck for inspection and allows damaged materials to be repaired or replaced. It involves more removal and disposal work, but provides direct access to the supporting surface.
Roof recover: In some cases, a new roof can be installed over the existing system. Before recommending this approach, the contractor should evaluate:
- The number and type of existing roof layers.
- Whether insulation or other materials are wet.
- The condition and load capacity of the deck.
- Compatibility with the proposed roofing system.
- Applicable code and manufacturer requirements.
Moisture findings help inform this decision. Wet or unsuitable materials must be addressed before the new system is installed. Covering damaged materials can leave problems beneath the new roof.
Step 2: Check the Roof Deck
The deck is the base that supports the roofing assembly. It may be metal, wood, or concrete. Once the old roof is removed, or where inspection openings are made, the crew looks for:
- Rust, corrosion, or holes in metal decks.
- Soft or rotted wood.
- Cracks or deterioration in concrete.
- Loose connections or damaged deck sections.
- Deflection or low areas that affect drainage.
Damaged sections need appropriate repair or replacement before the new roofing assembly goes down. Structural concerns may require evaluation by a qualified engineer.
A new roof needs a sound supporting deck.
Step 3: Install the Right Insulation
Insulation helps limit heat movement through the roof. Depending on the assembly, insulation and cover board also provide a suitable surface for the membrane.
On low-slope roofs, crews often use tapered insulation. These boards vary in thickness to create slope toward drains or other outlets. Crickets can direct water around rooftop units and other obstacles.
The insulation design should address applicable energy requirements, attachment requirements, and drainage needs. Existing insulation should only remain where its condition and the proposed system allow it.
Step 4: Lay Down the New Roof System
Next comes the main roof covering. Common choices for commercial buildings include:
- TPO: A single-ply membrane commonly available with a reflective white surface.
- EPDM: A synthetic rubber membrane known for flexibility and weather resistance.
- Modified bitumen: An asphalt-based membrane system available in several installation types.
- Metal: A roofing option whose suitability depends on the panel system, roof slope, and building design.
The right choice depends on your building, budget, and how the roof is used. Each system has its own requirements for attachment, seams, flashing, and installation conditions.
For another Indiana market, see our guide to commercial roof replacement in Evansville, IN.
Step 5: Seal Every Edge With Flashing
Roof leaks often develop at edges, transitions, and openings. Flashing connects the roof covering to features such as:
- Walls and parapets.
- HVAC curbs and vents.
- Skylights and roof hatches.
- Pipes and drains.
- Roof edges and scuppers.
Good flashing work takes time. Materials must be compatible with the roofing system, and seams, corners, and terminations must follow the specified details.
This is where careful installation makes a difference. A sound membrane cannot compensate for an opening around a poorly flashed penetration.
Step 6: Keep the Job Site Safe and Organized
Your business may be able to stay open during the work. That depends on the building’s operations, the roofing scope, and the precautions required.
Site planning should include:
- Separating work areas from customer and employee access.
- Identifying locations for trucks, dumpsters, materials, and cranes.
- Planning daily work areas and temporary weather protection.
- Coordinating around rooftop equipment and air intakes.
- Discussing noise, odors, work hours, and any access restrictions.
Clear communication with the building owner or manager helps coordinate the work and address changes as the project progresses.
Step 7: Final Inspection and Cleanup
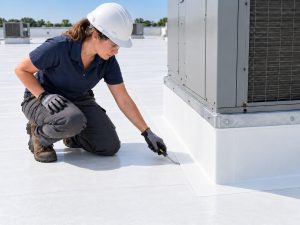
Installing the roof covering is not the last step. Completed work should be reviewed for the checks appropriate to the selected system, including seams, flashings, edges, attachment details, and drainage.
Additional testing may be appropriate for some projects. Water testing or electronic leak detection should only be used where suitable for the roof assembly and project conditions.
Cleanup should include roofing scraps, packaging, fasteners, and debris in the work and staging areas. Closeout documents should include applicable warranty paperwork, material information, and maintenance instructions. Manufacturer or permit inspections may also be required.
Ready to Plan Your New Roof?
Outdo Commercial Roofing provides commercial roof replacement services. Contact our team at 574-536-2823 to discuss a roof inspection for your Jeffersonville building and the scope your project may require.
Frequently Asked Questions
1. How long does a commercial roof replacement take?
Many projects take a few days to a few weeks. The schedule depends on roof size, the roofing system, access, weather, and the amount of removal required. Deck repairs and replacement of wet insulation can add time.
2. Can my business stay open during the roof replacement?
Often, yes, but it depends on the work and your building’s operations. Confirm access routes, staging areas, noise, odors, and any temporary restrictions before work begins. Some activities may require additional coordination or temporary closures.
3. Do I need a permit to replace a commercial roof in Jeffersonville?
Confirm the permit required for your replacement with the Jeffersonville Building Commission before work begins. The city provides online permitting and requires contractors working in the city to be licensed and insured. Your written agreement should identify who handles the permit.
4. Can a new roof be installed over my old roof?
Sometimes. A recover depends on the existing roof’s condition, moisture findings, number of layers, structural capacity, applicable code, and the proposed system’s requirements. Wet or damaged materials must be addressed before installation.
5. What is the best roof type for commercial buildings in Indiana?
There is no single best roof for every building. TPO, EPDM, modified bitumen, and metal each suit different applications. The choice depends on the roof deck, slope, insulation, wind requirements, building use, budget, and maintenance needs.
6. How much does a commercial roof replacement cost?
The cost depends on roof size, materials, access, and how much existing roofing must be removed. Deck repairs, replacement of wet insulation, drainage corrections, and flashing details also affect the price. A roof assessment and written scope provide the basis for a project-specific estimate.